How to find the printer's serical number (SN)?

There are three ways to access the SN of the printer: Connecting to "PrintMaster" App/Printing a self-test page/Scanning the QR code on the printer/Checking the printer body (some models)
Option 1: Using PrintMaster
1. Connect Your Printer: Make sure your printer is connected to PrintMaster via Bluetooth
2. Access the Details Page: Navigate to the details page of your connected printer. Here, you will find the serial number listed among other printer information.
Option 2: Confirmation by printer function
For Printers with a Screen:
1. Power On the Printer: Ensure your printer is turned on.
2. Install the paper roll: Install the paper roll into the printer, leaving a little distance for it to be detected properly.
3. Confirm SN: If the paper is detected, the screen will display SN
For Printers without a Screen:
1. Power On the Printer: Ensure your printer is turned on.
2. Double-Click the Power Button: Quickly press the power button twice. This action will trigger the printer to print a self-test page, which will display the serial number.
Operation video:
Option3: Scanning the QR code on the printer to access SN
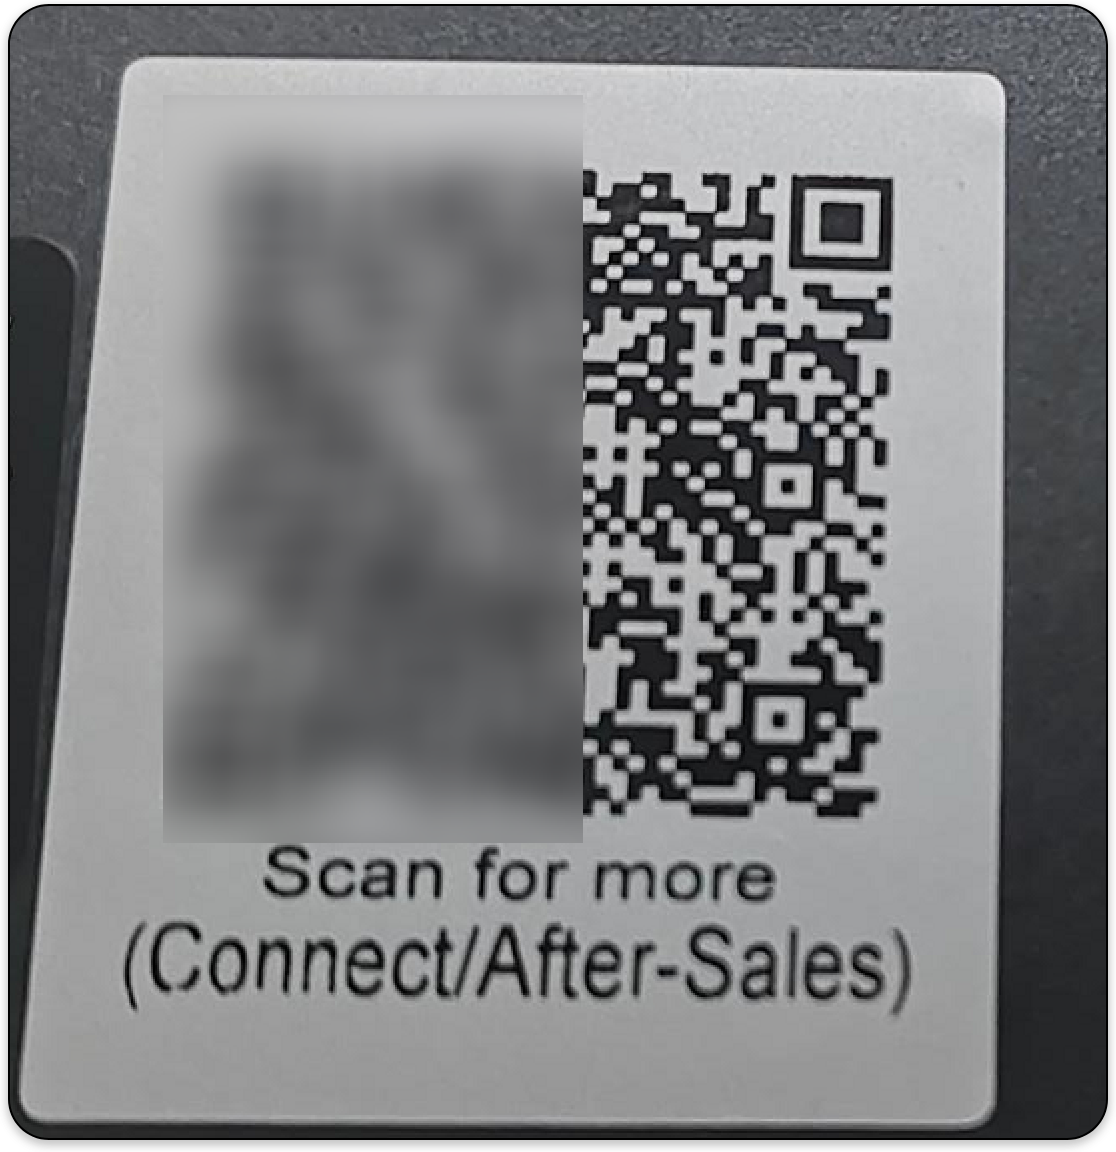
1. Locate the scannable QR code on the device and using your phone to scan it. (Note: the image below is just an example.)

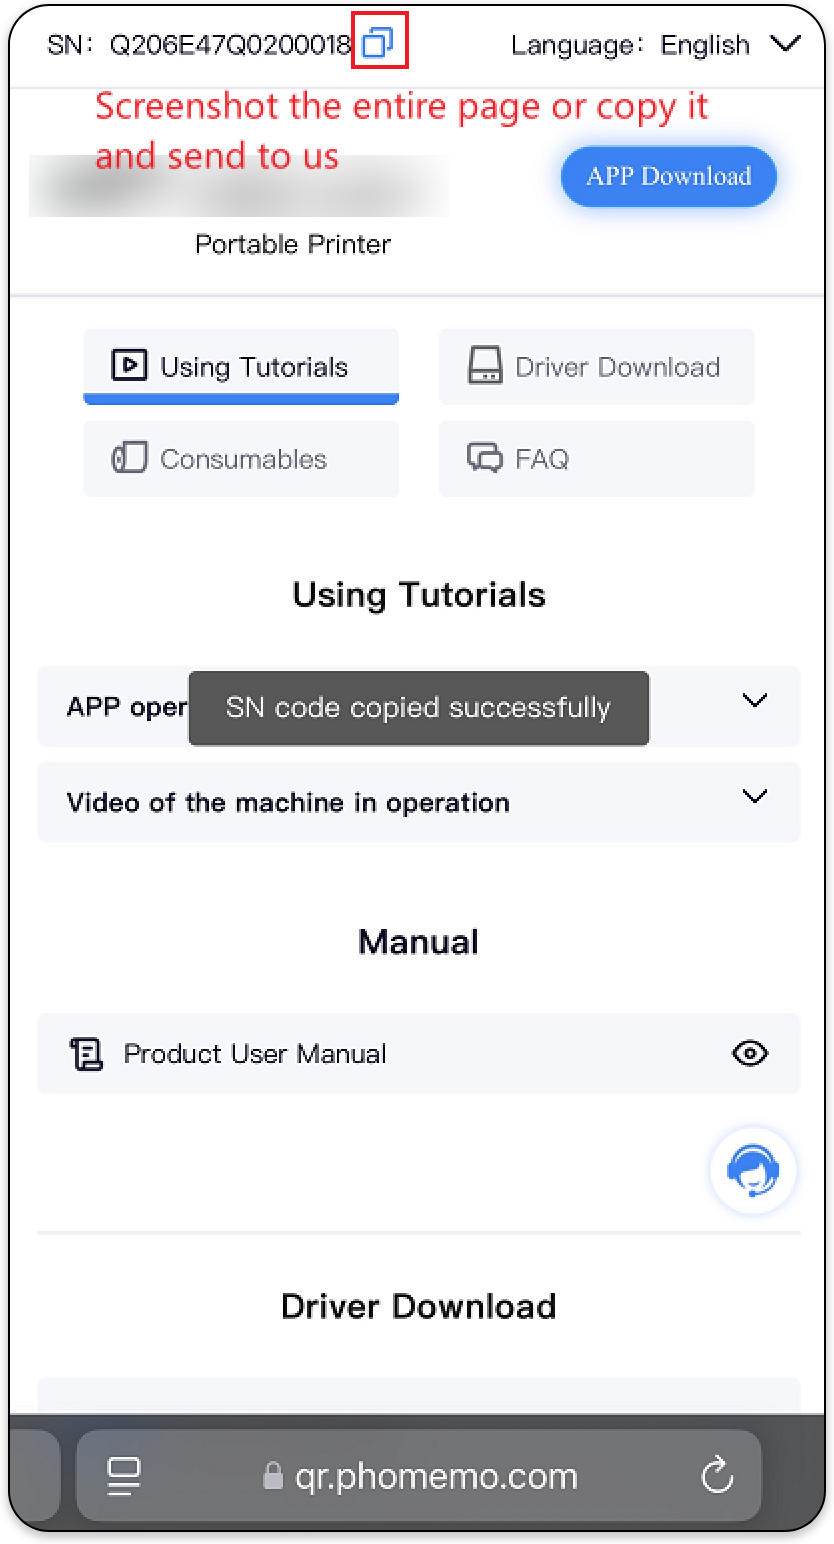
2. You will be redirected to a webpage as shown below. Find the serial number (SN) that starts with a "Q", take a screenshot of this page or copy it and send to us.

Option 4: Checking the Printer's Body
For some printer models, the serial number is physically labeled on the printer's body. It is usually a keypad that does not support Bluetooth connectivity, For example, H1100, E1000Pro, D1000, etc.
1. Inspect the Printer: Look for a sticker or label that may be located on the back, bottom, or side of the printer.
2. Read the Serial Number: The SN is usually printed in a clear format, often preceded by the letters "Q"
Related Articles
Home Printer and Bussiness Printer Connection Guide
HOME PRINTER: D30, P12 PRO, P12, M960, D50, Q30S, Q30, P3200, M950, E975, LM1600, LT12 BUSINESS PRINTER: M110, M120, M200, M221, M220 Overview of applicable printers HOME PRINTER The models of Home Printer that are compatible with the Print Master ...[BUSINESS LABEL Priner] How Printer Connect to Windows
BUSINESS PRINTER: M110, M120, M200, M221, M220, M250, M260, M100, M150 Overview of applicable printers BUSINESS LABEL MAKER Business Printer are compatible with the Print Master(App), Labelife( Windows, Mac ) and Direct Print(Windows, Mac). Print via ...[M110/M220 Series] How to Charge Your Printer Correctly
1. Make sure the socket is powered normally Please ensure the wall plug has electricity by plugging another device into the same plug. 2. Use the official charging cable included Because of the variety of cable protocols, using official cables is the ...[P12] Printer Out of Ink or Blank Printouts
Blank Printing Results 1. Check the Print Head Open the printer cover, remove the paper roll, and check if the print head is jammed by labels or foreign objects. 2. Check Battery Power Try using a fresh set of alkaline batteries. If the voltage is ...[M110]How to set up the Printer (language, fonts, print density, etc.)
Printer Related How to change the printer display language: Click the power button once, select the language via the paper feed button on right, and press and hold the power button to confirm. How to change the print density: Click the Power button ...